Wednesday, 22 February 2012

Another TL-01 then...

I did think about converting one of the other TL-01 trucks to become the downgeared version, but on the other hand I really like them as they are and don't particularly want to change any of them. My spare parts box is/was pretty full though, so I think it is probably best to use all of this stuff up and build a fourth truck. I bought a couple of spare chassis along the way, one was empty of mechanical parts and the other was a fairly rare lightweight (grey plastic) touring car chassis, which I sold on minus its nicely hopped-up internals for more than I paid for it.

Anyway, here's my kit of spare parts:


The first spare chassis got used to replace the one on Blue truck after it got cracked when it collided with the triangular base bar of a park picnic table which was hidden in long grass (the bar not the table!). The chassis I've used to try out this modification is the only spare I've now got and is unfortunately the cracked one. I've tried to repair it once already with chemical (epoxy) metal but this proved not to be strong enough. I'm now going to have to make some sort of metal shoe to reinforce this area, which is where the front arms attach. I've highlighted the cracks, which are in different places on each side, with a red CD writing pen. The ink from these tends to draw itself into the cracks making them easier to see:


An evening's work has got me this far. I've locked the differentials with hot glue, and have used bronze bushings to replace the plastic originals throughout the gearboxes and driveline. I couldn't really see the point of going for expensive bearings here, being as this truck won't need any advantages that these can give. Besides which it's likely to get pretty wet and muddy at some point, which would probably wreck them anyway.


I've used black screws everywhere they are visible just to keep things as tidy as possible. The pinion gear isn't here yet so I can't yet fit the new gearbox - the next stage will now be to get all the electrics fitted.

Tuesday, 21 February 2012

Gearing down a TL-01 (Part 3)

The only other thing I'm actually going to need to buy for this conversion is a 23 tooth motor pinion gear. I already have a 'speed tuned' gear set here, which came with a complete chassis I bought some time ago for a tenner.

Obtaining a 23t pinion gear is not difficult if I wanted to use standard Tamiya parts, but there are a couple of downsides to this choice. The first of these is the fact that Tamiya 'AV' pinions are made of a very soft aluminium, and this means that they wear out quite quickly. I've used up several in my three TL-01 trucks over the past few years, they last reasonably well with standard 'silver can' motors but cannot really take the power of a tuned motor. They tend to wear their teeth to sharp points, and make increasing amounts of noise as they do so (also noticeable if you manually push the car backwards). They also leave grey alumimium oxide residue, which is itself abrasive, on the other (plastic) gears in the rear gearbox.

The second downside is that you have to purchase them in pairs with a one-tooth difference between them, and one out of each pair does not fit a TL-01. Therefore you have to pay extra for something you are not ever going to use.


Here are the part numbers for each of the sets that contain one gear that will fit a TL-01 (options - 19, 21 and 23t):

Tamiya 50355, 18T & 19T AV Pinion Gear Set
Tamiya 50356, 20T & 21T AV Pinion Gear Set
Tamiya 50357, 22T & 23T AV Pinion Gear Set

It must be noted that Tamiya refer to the pitch of these gears as METRIC 48 pitch, which is not the same as a regular IMPERIAL 48dp (diametric pitch) gear.

This 'AV' size was used in Manta Ray, Group C, TL01, TB01, Wild Dagger, Detonator, Vanquish, Avante2001 etc.

In reality these Tamiya gears are metric 0.6 module pitch, which do NOT mesh correctly with normal 48dp pitch gears. My understanding, having read a fair number of RC forum posts, is that 0.6 mod equates to 42 pitch, and that GPM aluminium spur gears for a TL-01 are advertised as being this size.

(For reference 48dp - imperial diametric pitch = 48 teeth on a 1-inch diameter gear, 64 pitch = 64 teeth etc.)

I cannot find any reference to Tamiya clarifying this issue - their official answer is to "only buy Tamiya pinions"!

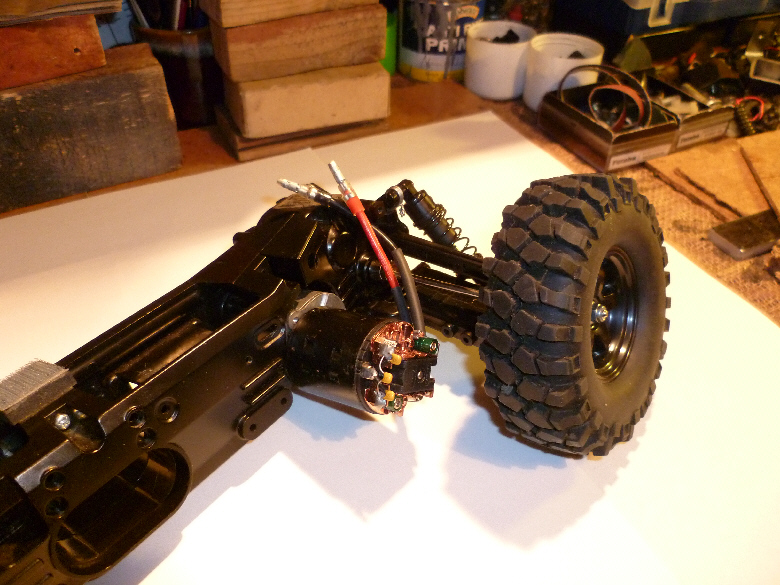
Now to the Tamiya TL01 Speed-Tuned Gear Set (#53342 or OP-342):


These are moulded in black plastic, to easily discern them from the standard (off-white coloured) version.

Also for reference, here are the Final Drive Ratios (FDRs) for each fitable size pinion, and again for each size when used with the Speed Tuned gearset.

Pinion Gear..... Normal Ratio...... Speed-tuned Ratio
19T ................. 7.96 ................. 5.95
21T ................. 7.20 ................. 5.39
23T ................. 6.57 ................. 4.92

This is the pinion gear I've chosen to use. It is intended for use in a Maverick Strada TC/MT/XT/XB series car/truck/truggy/buggy. Its part number and description are MV22081 MOTOR GEAR 23T 0.6 MODULE:


£3.53 + £0.89 postage & packaging.

UPDATE:

You can forget all I wrote at the start of this post about needing to buy a 23t pinion. I didn't. As I realised when I came to put the gearbox into the truck the mounting holes on the gearbox (to the truck) are not diametically opposite in relation to the output shaft.

This means that a 23t pinion will not fit, even though the gearbox is fitted to the truck on the 23t mounting holes. Actually, the difference in the offset is almost exactly equivalent to four teeth on the motor pinion. So a 19 tooth pinion DOES fit here instead. And being as I already had at least one spare 19t here anyway I had no need to buy anything new (beyond the gearbox itself) at all.

Anyway I hope the following makes things a bit clearer. If you use a rule on the gearbox lining up the mounting holes (this only works on one side!) it also just touches the output shaft as a near-perfect tangent, whereas the imaginary correct line should have passed centrally hole to shaft to hole.

Sunday, 19 February 2012

Gearing down a TL-01 (Part 2)

OK. Starting at the end point. The first picture shows the HPI 87634 gearbox mounted into the Tamiya Tl-01 chassis, as fitted with the longer Baja King/Champ suspension arms and a 1.9" wheel and tyre, along with an attached Integy 35 turn lathe motor.


In order to obtain the best possible wheel torque for crawling and climbing
ability, the object of the exercise is to try to achieve an approximately 3.0/3.5 MPH (or good walking pace) top speed for the truck.

The gearbox is positioned to use the 23 tooth pinion option (and the chassis motor mounting holes to match) because the ratio of the gearbox is a rather large
7.4 to 1, and this would give excessive overall reduction with any of the smaller available (19t, 21t) pinion sizes. To achieve the best possible wheel speed for crawling and climbing use it is likely that a 'SPEED TUNED' internal gear set will also be required to additionally compensate for the gearbox's large reduction ratio.

This pinion choice has the distinct advantage of mounting the gearbox as far forwards as possible. This positioning means that it is necessary to remove a lesser amount of plastic material from the rear (left-side and smallest) part of the main chassis in order to fit the new additional gearbox. This rear (left) part is one-half of the rear main gearbox compartment, and it is far easier to re-make and reseal this area to prevent otherwise damaging foreign object ingress when less material is initially removed.

There is plenty of tyre/motor clearance, in fact more than is found on any TL-01 fitted with standard touring car suspension arms, these including the Stadium Raider and Ford Lightning trucks. The next three pictures show different views with the gearbox and motor fitted (N.B. the suspension arm has been reversed - this gives the longest possible wheelbase when using only standard parts):


The next three photos show inverted views. The gearbox smoothly protrudes below the bottom of the chassis by about 6mm (1/4").


An additional advantage of this mod is that a motor guard/heatsink will now fit around the completely exposed motor. Previously, when the motor was buried in the chassis, a full size heatsink would not fit.


Three more views, showing the gearbox alone in the chassis. In the last one daylight can just be seen past the box. In reality the box is quite a tight fit in there, and becomes in part a longitudinal structural member.


The chassis only requires cutting of the left hand side, which is ordinarily constructed in two parts, whereas the right hand side is a single piece and does not need any re-working. These next two pictures show the material removed from the lower part(s) of the motor area. The lower of the two little 'fins' above the motor protector mount has been trimmed back slightly just to avoid contact with the motor itself:


These last two pictures mainly show the amount of material removed from the front (left) chassis section. The rearmost upper and lower screw locations remain unaffected:


Tuesday, 14 February 2012

Gearing down a TL-01 (Part 1)

With having three Tamiya TL-01 based trucks in the collection ('Blue' 'Red/Yellow' and 'Army'), all of which get used in a variety of environments, it has not escaped my attention that these things are just a bit overgeared for certain styles of off-road running - i.e. going anywhere slowly. It stands to reason really, being as the chassis was originally designed for use in a touring car, and that it's not that difficult to get 40+mph out of a reasonably tuned example.

Not so good if you want to plod around in the woods though - running bigger tyres definitely works against you in this direction as well. Red/Yellow and Army both run the lowest possible gearing, via fitment of a 19 tooth motor pinion (out of a choice of 19, 21 or 23 teeth), but this still doesn't give me much stump-pulling torque. Blue is a litle bit different being as it's currently more of a fast street truck, running a 19 turn motor and a 21 tooth pinion.

On various RC forums I've read that others have managed to get a 16 tooth pinion to work in a TL-01 by drilling new motor mount holes in the correct positions to achieve proper meshing, although I haven't come across any photos showing how this was actually done. Whether plastic had to be removed from the rear gearbox portion of the chassis remains to be seen, but either way, the motor mounting had to be physically relocated in a generally rearwards direction. The change in gearing that this mod gives is simply 16/19 = 0.84210 - therefore a 15.7894% reduction (if my maths is correct).

OK. Change of subject for a few minutes.

Over the last few weeks there have been a huge amount of HPI RC spares appearing on eBay. These include those for Maverick Scout crawlers and HPI Wheely Kings. Of particular interest to me among these was a 87632 HPI WHEELY KING COMPLETE ROCK CRAWLER CONVERSION SET.


Normally retailing for RRP £127.99 and appearing on eBay for one penny less, these started appearing for £39.99 plus £3.95 postage. A quick search on the net found them available direct from Modelsports (in Otley, West Yorkshire) for £32 with £6 for courier delivery.

That's very nice buy I thought to myself. The tyres alone would normally be well over the asking price. And there's plenty more in there to keep my project bench active for quite some time to come! With the first few sets disappearing off eBay quite quickly I felt that I really had to get one before they all went, assuming that the discount is available only because of a temporary overstock situation. As it had happened, my Mum had given me £30 for a new pair of jeans as a Christmas present, I hadn't got them yet and now I'm still going to need to get a pair! Oh well, I guess I'm old enough (52) to choose my own presents!

Anyway, although you can't see it in the photo this kit also includes the #87634 Reduction Gear Box.

Fits Model > 102117 - RTR CRAWLER KING WITH JEEP® WRANGLER® RUBICON BODY

Part: REDUCTION GEAR BOX SET (WHEELY KING)


Description: Transform the Wheely King truck into a rock crawling beast with this Reduction Gear Box Set. This genuine HPI factory approved gear box bolts right into any Wheely King for a perfect fit. It contains a tough metal case, ball bearings and all-metal gears for extra durability. The gear ratio is transformed from 23:1 on the stock truck to a whopping 174:1 after the installation. This Reduction Gear Box Set is perfect for rock crawling because it delivers stump pulling torque and the power to climb any slope. Recommended for use with #87633 Wheely King Crawler Conversion Set, but it can also be used individually or as the basis for a custom project.

Part Category > Car > Car Spares & Options > Specific Car Spares & Options > Drivetrain

Part Number: 87634

Part Area: Drivetrain

Part Type: Optional / Hop Up / Racing

Weight (g): 82

Part Status: Current Part

(Current eBay price £17.32 + £0.99 Standard Delivery)

My first question concerning this lovely little gearbox, even before I'd ordered the kit, was - can one of these be fitted into a TL-01 chassis?

The answer I discovered last night, after two hours fairly fiddly work, is a reasonably qualified 'yes'.

(Being as the camera battery is flat right now and it needs an overnight in the charger, how I did this (first stage of another truck?) will now be the topic for the next post. Coming up ASAP.)

Monday, 9 January 2012

Army truck gets a winter makeover


The Army TL01 truck has had something of a makeover to make it a bit better for off road running, which is really its natural environment. Previously it all too often lost traction as soon as it suffered any amount of wheelspin, so now I've locked both of its gearbox differentials using the normal hot glue method. The truck is now powered by an Integy 35 turn motor for increased torque, and it also now wears my old glued F-350 wheels and tyres (which were left over from the original 'Blue truck' project, now itself in its second - going on third - guise).

I've trimmed the body down by about 12mm along the bottom edges, partly to allow for easier battery changes, but also because it had cracked on one side here anyway.

I think it definitely looks better like this.

Run times have increased by about 20% with the swap from the 27 to the 35 turn motors, although it is still somewhat overgeared, even with the smallest possible (19 tooth) pinion fitted. The wheel and tyre change hasn't helped this any, being as the F-350 tyres have an outside diameter of about 93mm, against around 87mm for the earlier Pajero ones. The grip is much better though, and it'll just about pull away from rest up a 30 degree slope. It does though still have reasonable wheelspeed for everyday running, it isn't really a crawler, but then again it doesn't have the suspension travel for this anyway.

We're now using an iWaver 27Mhz transmitter to drive the truck with, replacing the previous HPI TF-3 handset (the RX hasn't needed to be changed). This unit, found on eBay for a tenner, has a case that is externally absolutely identical to a Futaba 3PM (FM or FS - although the FS, being synthesized, doesn't have a crystal slot), of which I have one of each for my other trucks. I don't know whether the iWaver is simply a lesser-specification clone of the Futaba TX, or whether it is actually produced for iWaver by Futaba, but A FEW WORDS OF WARNING ARE NECESSARY in case anyone reading this comes here by way of a Google (etc) search looking for info about these iWaver units.


THE BATTERY TRAYS, ALTHOUGH IDENTICAL AND INTERCHANGEABLE, ARE BOTH FITTED WITH FUTABA J TYPE PLUG-IN CONNECTORS. THESE ARE WIRED UP DIFFERENTLY, POSITIVE AND NEGATIVE ARE REVERSED BETWEEN THE TWO TYPES, iWAVER and FUTABA. I very nearly made the mistake of swapping a full tray because I charge my trays as a complete unit and had flat batteries in one and charged ones in the other. IF YOU SWAP BETWEEN THESE TWO TYPES WITHOUT REVERSING THE PINS IN THE PLUG (or putting the batteries in the wrong way around i.e. battery + end to spring) YOU MAY WELL END UP DESTROYING YOUR TRANSMITTER. EQUALLY, FITTING A RECHARGEABLE PACK INTENDED FOR A FUTABA TX INTO A iWAVER UNIT MAY CAUSE THE SAME PROBLEM. I'm (obviously) not going to carry out an experiment to see if this actually happens, although I've seen this happen with other RC equipment. IF YOU READ THIS AND OWN BOTH TYPES OF TX, PLEASE CONSIDER YOURSELF WARNED ABOUT THIS POTENTIALLY DESTRUCTIVE ISSUE!

Friday, 21 October 2011

Autumn update

The most important thing is that the family member is now back home and is slowly recovering from being in a serious life-threatening condition. A fair bit of my time is still being taken up by the overall situation.

A few of the RCs have been out on various occasions, the Axial gets used in the back garden more often than anything else. The Scorpion/Spider still needs much better servos, but funds aren't available for these right now. The 'Zilla has gained a rear-view mirror and has had its roll-cage mounts remade after I broke them for the second time. This time I've made them out of composite plastic and alloy - hopefully they are now strong enough for routine roll-overs!

Everything else project-wise is currently on hold. I'll pick things up in the New Year.

Wednesday, 14 September 2011

Summer but no time to play (or write)

Unfortunately a close family member is fairly ill. This now means that a lot of my time, spare and otherwise, is being taken elsewhere.

Updates here may now not be as often as I would otherwise prefer.

I'll be back to RC-ing ASAP! I'll do a (some?) catch-up posting when I can.

Sunday, 7 August 2011

It's a serial servo killer!

I'm not having much luck with my servo survival rate. The first MG995 died even before I'd got the truck out of the house and now it's killing them at the rate of one per battery pack. I guess the combination of huge grippy tyres and locked differentials is just too for them. After the death of three I swapped to Power HD HD-1501MG Metal Gear 17kg servos, but these faired no better. The first of these (fitted to the rear of the truck) burnt out its circuit board after a 30 minute continuous run, causing an internal fire which holed the plastic case with much accompanying smoke. And the smell - OMG! Being as I was on the beach at Anchor Head at the time the only water available came from a rock pool but at least it saved the rest of the crawler. As I extinguished the burning I could see glowing red hot metal through the unwanted hole in the casing!

Anyway, the seller replaced the item, claiming they are normally very reliable and that this one must have a manufacturing fault. On the following trip out the front one gave up the ghost as well, with the output shaft becoming very loose and the servo locking out at full travel in one direction when no power was applied. Turning on the power brings it back to neutral but then it gets very glitchy so obviously the potentiometer is now getting out of synch due to some degree of gear damage.

I guess at some point I'm going to have to buy some Savox metal-cased servos, although these are very expensive at about £55 each for the normal versions, and £85 for the titanium geared varieties.

There's nothing in the piggy-bank at the moment - so future posting may be delayed for a while!

Friday, 8 July 2011

RTR - ready to run...

Everything is now assembled, the electrics are wired up, and we're all ready for a quick test run in the great outdoors. The Gmade Spider axled 'n wheeled/tyred crawler (note to self - will have to think of a name for it) is currently in two-wheel steer mode only because one of the cheapo MG995 steering servos I bought only lasted about 30 seconds. Rumour has it that they either pack up straight away or go on for ages, so hopefully the front one will be good for some time. I've ordered a couple more, tho from the UK this time rather than from Hong Kong being as I can't be bothered to wait a few weeks for them to get here. A bit more expensive this way, but not too much. The current bargain price on eBay is two for under £15 delivered.

Anyway, the pictures show the articulation and the working clearances at full tilt, I personally think the dimensioning worked out just fine, it'll go to the full 90 degrees of twist with just a bit of pressure applied.

What do you think of it as a home-made (on a budget) superclass-sized rock crawler?


Thursday, 7 July 2011

Two and a half hours later...

My Gmade Spider crawler project now looks like this... Time for bed!!


Wednesday, 6 July 2011

Made and painted

All the parts for the 'pod' of the centre chassis are now made and painted. I'd write a longer post tonight but I've got some assembling to do...

Monday, 27 June 2011

Cranked!

The top plates are done, and I've now made the rear links by bending the rods around a piece of 60mm tube, which was held in a vice. I bent them in pairs so the left and right sides are identical. It proved to be a bit awkward to measure the lengths because I didn't know the exact angle they were going to end up being. So it was a bit of trial and error to begin with, and then I just trimmed the rods back until the wheelbase looked right. I may have gained about a quarter inch or so on the back but this may be beneficial as it sends the weight bias forwards. The links are now covered with heatshrink tubing, the lower ones will get spiral wrapped as well before we hit the rocks.


The shocks have been preloaded to get the springing about right - I made the spacers out of a piece of thin wall 15mm polished aluminium decorative tube. The back pair are just a couple of millimeters longer than the fronts to compensate for the forwards bias and resulting slight difference in shock angle.

Saturday, 28 May 2011

Back to my long-shock crawler plan!

Whilst considering my various options for building my Gmade Spider axles into a truck of some description, one of my ideas is to use long HPI Savage XSS shocks with a four-link crawler chassis. This is something I pondered whilst initially building the Clodzilla, though I took the notion no further at the time (other than buying 4 stock items for two pounds each) as I obviously wanted to use and try out the supplied cantilever setup. So whilst the axles are still free it seems a good time to consider what can now be done with these.


I've started by initially constructing a new centre section out of 2mm (for the lower side plates) and 8mm (for the base) aluminium plate. This has a width of 80mm, with a distance of 120mm between the lower link mounts, and 82mm between the uppers, with 40mm vertically between them. This leaves them pretty close to parallel when viewed from the side. What I've done here is to reverse the positions of the pairs when compared with the 'Zilla. Now, the upper pair are mounted inboard at the chassis end and the outer pair run to the bottom of the axles. Also the upper links are longer on the top, whereas the 'Zilla ones were all of equal length. So far articulation seems reasonable, the axle moves up and down until the ball ends bind out, and wheel clearance is improved again in comparison with the 'Z. Currently I've only made one set of linkages to test the design, once the lengths are finalised the ones at the rear will probably become the fronts, then maybe I'll be able to crank the not-yet produced rears slightly to alleviate some potential hang-up issues.


The centre section itself was initially devised to accommodate a standard 7.2V stick pack, which can be seen in its place already. The thick piece of plate poking out the front isn't anything to do with the construction, it's the same material as the base is made out of, for the time being the extra bit is only maintaining rigidity here, later on some of it may become an upper or mid-chassis plate mounting the necessary accessories. The new lower side plates are still covered with the blue plastic coating that come on (some) new ally sheet, and I've just used a redundant Tamiya TLT side plate (currently located with elastic bands alone!) to set the shock upper position. This dimensioning will set the ride height of the truck exactly, and may well require considerable adjustability building in. This positioning simultaneously adjusts the wheelbase of the truck, which without changing rods can be varied between about 17 and 20 inches depending on centre section ground clearance. This will be the next stage - designing and producing the upper chassis plates.


The Axial shell is a left-over from that project and I think it suits. The bottom of it should line up with the bottom of the centre section when it's properly mounted. One of the later tricks will be to make the H2 Hummer body fit as well, although I'll have to significantly limit the suspension travel. So far there's only been one dropped goolie. I managed to snap a M3 starter tap when cutting one of the (10) threads in the base plate. It broke sub-surface at full depth so it's in there pretty tightly. I don't think there's much chance of getting it out, although I'll have a go after I've got it good and hot. Beyond that I might be able to drill it out being as it is only made of High Speed Steel, though I'll have to make a jig for concentricity, and even then it will probably knacker a cobalt steel drill or two and the hole to boot. Uggggh!

Saturday, 30 April 2011

'Zilla at Sand Bay

Long overdue - a bit of video of the Clodzilla in action. This was filmed a couple of days ago on the breakwater rocks at Sand Bay, near Weston Super Mare in North Somerset. This was the best of the footage I took, just after this the rear servo escaped its mounting costing me a fair degree of steering authority. Easily fixed though, now where did I put that bag of cable-ties?


http://www.youtube.com/watch?v=3mAb7TuxtCc

Thursday, 21 April 2011

H2 build - first steps - strip and consider!

I've stripped the New Bright Hummer as far as I need to for the time being, and have assembled a wooden mounting block for it to sit on, which also sets the ground clearance at exactly the same distance as it was on the original truck.


This (below) is the 'flat bottom' of the floorplate - devoid of any interior detail and with large holes in it. The strength and rigidity of this comes the box structure which screws on beneath it.


I've turned it upside down here to appreciate the depth of the box. About one half-inch of this is moulded below (above here) the main plate, the rest is a separate sub-structure piece. The large bulge at the front of the box is where the steering arms and steering servo along with the large front bumber are normally mounted.


This is the sub-structure box. It also contains (among other things) the standard battery mounting case, the main electrical circuit board is clipped and screwed on top of this. The only difficulty in disassembling the truck occurs here because two screws locate the main battery connecting straps, and only one of these is readily accessible, the other is located beneath the circuit board. It appears that in the factory the straps are fitted with their screws first, and then the circuit board is soldered to them after it is fitted in place. I did manage to get the awkward one out without damaging anything else, although the head was fairly chewed up by the time it was removed.


This next shot shows the standard mounting point for the rear trailing arm/gearbox/rear axle/motor assembly. More about this later.


All together again and upside down. One of my Gmade axles is in position here, demonstrating its fitting position. It's not suspended in any way, so this is its maximum 'upwards' position, in fact it will rub the body quite hard if it ever reaches this far whilst in motion.


Back up the other way, and the axle is now unattached in its natural relaxed location. Firstly from the front...


...and then from the rear.


Here we have an assortment of readily available material to possibly construct a new rear subframe out of. This project isn't really about throwing lots of money around, I fully intend to make full use of anything I already have lying around in the workroom!


Finally, here's the other axle, along with the now surplus New Bright one. This is the first mock-up for a stick type chassis that may well get made at some point either sooner or later in time. This brings me to a important decision point about making the Hummer either a two or four-wheel drive project. (Oh yes - in case anyone points this out - that is a completely flat PP3 battery!!)


If I (initially at least) decide on a two-wheel drive approach for the H2, this leaves me with a spare axle to continue designing a stick-type crawler with. I could also consider the possibility of incorporating Gmade Spider axles into the Clodzilla, although this wasn't a key reason in the decision to purchase them in the first place.

I've now got more than plenty to think about, at the very least...